A toilet flange is the fitting that joins the toilet outlet to the home’s drain system. It usually sits level with, or slightly above, the finished floor. Beneath it, a short hub or pipe section connects with the waste line. This raises a practical question: how does a toilet flange connect to the drain pipe? The answer depends on the flange design. Some flanges fit inside the pipe, while others slide over its outside diameter. Solvent welding, mechanical compression, or approved gaskets create the connection.
Roger Wakefield, a licensed plumber and plumbing educator, explains, “A toilet flange connects the toilet to the drainpipe and secures the toilet to the floor.” That simple description covers two jobs. The flange directs wastewater downward. It also receives the closet bolts that hold the toilet in place. A wax ring or wax-free seal sits between the toilet base and flange. It blocks sewer gases and prevents leakage around the joint.
Installation details matter more than many homeowners expect. A flange sitting too low can leave the wax ring partly compressed. A loose flange may allow the toilet to rock, crack the seal, and stain the floor. Not ideal. Inspect the subfloor, pipe edge, flange height, and bolt slots before installing the toilet. Local plumbing codes can differ, so experienced plumbers verify approved materials and connection methods. This guide examines each part closely, including common repair mistakes and the small alignment details that keep the drain connection dependable.
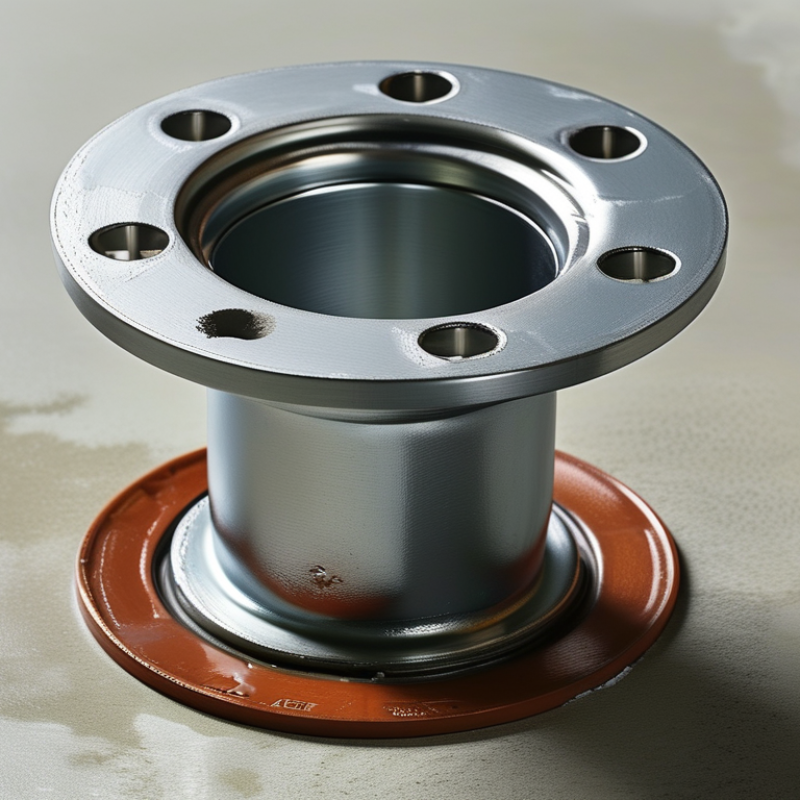
A toilet flange is the fitting that joins the toilet to the drainpipe. It usually sits on the finished floor around the drain opening. The toilet’s two mounting bolts pass through the flange. A wax or elastomeric seal sits between the toilet base and flange. This seal blocks wastewater and sewer gases. The flange also holds the toilet firmly, preventing movement during use.
During a repair, I check three points: flange height, floor stability, and drain alignment. A flange that sits too low can leave the seal compressed unevenly. A cracked ring may allow the toilet to rock. That movement can damage the seal, even when the toilet looks properly installed. I have found that a clean-looking flange is not always a sound flange. That detail deserves more attention.
The U.S. Water Research Foundation’s Residential End Uses of Water, Version 2, reports that toilets use about 24% of indoor household water. The U.S. Environmental Protection Agency also identifies 1.28 gallons per flush as the maximum for WaterSense-labeled toilets. These figures show why a secure drain connection matters. A poor flange connection can waste water through hidden leakage. It can also stain flooring around the toilet. Follow local plumbing requirements, and replace damaged hardware rather than forcing a loose connection.
| Data Dimension | Typical Information | Function or Connection Detail |
|---|---|---|
| Basic definition | A toilet flange, also called a closet flange, is a fitting installed at the floor-level drain opening. | It connects the toilet outlet to the drainpipe and provides a base for securing the toilet to the floor. |
| Main connection path | Toilet outlet → wax or rubber sealing gasket → flange opening → drainpipe → building drainage system | The flange forms the transition between the toilet and the drain while the gasket seals the joint against leaks and sewer gases. |
| Primary components | Flange ring, central opening, fastening slots or bolt channels, and a drainpipe connection section | The ring rests on or is secured to the finished floor, while the central opening aligns with the drainpipe. |
| Toilet fastening method | Two closet bolts are commonly positioned opposite each other in the flange slots. | The bolts pass through the toilet base and are tightened with nuts to hold the toilet in position. |
| Seal location | Between the toilet horn and the upper surface of the flange | The seal prevents wastewater from escaping and helps stop sewer odors from entering the room. |
| Common flange materials | PVC, ABS, cast iron, stainless steel, and brass | The flange material should be compatible with the existing drainpipe and the installation method. |
| Typical drainpipe sizes | Most residential toilet drains use a nominal 3-inch or 4-inch drain connection. | The exact size depends on the existing plumbing and the flange design; the pipe should be measured before replacement. |
| Finished-floor position | The flange is generally installed level with or slightly above the finished floor. | A flange that is too low can prevent the seal from compressing properly; an excessively high flange can interfere with toilet placement. |
| Required alignment | The flange opening must align with the toilet outlet and the drainpipe below. | Proper alignment supports a uniform seal and helps prevent stress on the toilet and drain connection. |
| Structural support | The flange should be firmly attached to the subfloor or an appropriate supporting surface. | A secure flange keeps the toilet from rocking and reduces the chance of seal failure. |
| Common failure signs | Toilet rocking, water around the base, sewer odors, loose bolts, or visible corrosion | These symptoms may indicate a damaged flange, a failed seal, poor floor support, or incorrect installation. |
| Replacement considerations | Match the new flange to the drainpipe material, pipe diameter, floor height, and fastening layout. | The old flange may need to be cut out, unscrewed, or repaired depending on its condition and connection type. |
| Installation sequence | Prepare the drain, install and secure the flange, fit the seal, lower the toilet, tighten the bolts, and test for leaks. | The toilet should sit firmly and remain level without excessive bolt tightening, which can damage the ceramic base. |
A toilet flange is a mounting ring connecting the toilet to the drainpipe. It sits around the floor opening. Closet bolts pass through it. A wax or rubber seal closes the joint.
It supports the toilet, centers the drain connection, and helps block wastewater and sewer gases. It also keeps the toilet from shifting during use. Small movement matters.
The flange should rest at the correct height near the finished floor. A low flange may not compress the seal properly. A high flange can make the toilet rock.
Common materials include plastic, cast iron, stainless steel, and brass. Plastic resists corrosion. Metal can offer strong support, but moisture may cause rust.
Inspect the ring, bolts, drainpipe, and surrounding floor. Press the floor gently for softness or flexing. Check that the flange is level and firmly anchored. Appearance can deceive.
A rocking toilet, stained flooring, loose bolts, or repeated seal failure may indicate damage. A cracked ring can let the toilet move. Hidden leakage may continue underneath.
Shims may reduce minor movement, but they cannot replace a properly supported flange. Check the floor and flange first. I might overestimate a quick fix here.
Tighten both nuts gradually and alternate sides. Stop when the toilet feels stable. Excessive force can crack the ceramic base. Gentle pressure works better.
A toilet flange is the fitting that anchors a toilet to the floor while creating a sealed connection between the toilet outlet and the drainpipe. It usually includes a circular ring, mounting slots or holes, and a central opening, and it may be made from materials such as PVC, stainless steel, brass, or cast metal. The flange works with a wax or rubber seal to prevent leaks and odors while keeping the toilet stable.
Understanding how does a toilet flange connect to the drain pipe begins with its position over the drain opening. During installation, the flange is aligned with the pipe, secured to the finished floor, and connected to the drain system. The toilet is then placed over the flange and tightened evenly. Common problems include cracked rings, loose fasteners, poor alignment, and damaged seals. Basic repairs may involve replacing the seal, reinforcing or replacing the flange, and correcting the pipe connection when necessary.

 EZ STEEL