Flanging an exhaust pipe is an essential skill for any automotive enthusiast. Understanding how to flange exhaust pipe can significantly enhance your vehicle's performance and efficiency. A well-flanged exhaust system ensures proper sealing and reduces the risk of leaks. This process requires precision and the right tools, which can be intimidating for beginners.
Many people struggle with the correct technique. It's crucial to select the right materials for your project. Common mistakes include not measuring accurately or applying uneven pressure while flanging. These errors can lead to frustrating setbacks. Nevertheless, learning from these experiences can deepen your expertise in exhaust systems.
As you delve into this process, remember that practice makes perfect. Each attempt offers a valuable lesson. With the right guidance and attention to detail, anyone can master how to flange exhaust pipe effectively. The journey may be challenging but rewarding for those passionate about automotive work.
Flanging an exhaust pipe is essential for creating strong, leak-proof connections in a vehicle's exhaust system. This process helps improve exhaust flow and enhances engine performance. According to industry reports, improper flanging can reduce exhaust efficiency by over 30%. Understanding the flanging techniques can lead to better results.
Using the right tools is crucial. A flanging tool should fit the pipe diameter properly. This ensures a tight seal that prevents leaks. Some professionals recommend using hydraulic flanging machines for precision. Manual flanging methods can produce varying results. They require practice and experience to master.
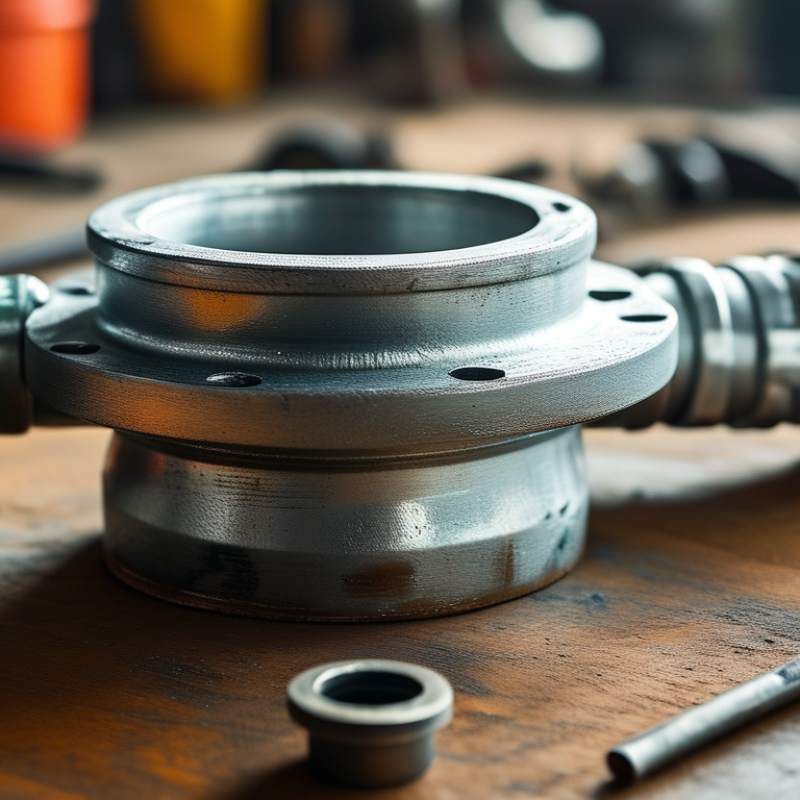
It's important to assess the pipe and flange condition. Rust or deformation can lead to failures down the line. Experts suggest checking the fit before finalizing the flange. This can save time and cost. In many cases, a poorly flanged connection can lead to annoying leaks and performance issues. Regularly reviewing your technique will help improve your skills over time.
When it comes to flanging exhaust pipes, having the right tools and materials is crucial. Start with a good quality exhaust flanging tool. This tool reshapes the pipe ends effectively, creating a strong seal. A pipe cutter will help to achieve clean cuts, providing an even surface for fitting. Don't forget to use a deburring tool to smooth out sharp edges. This small step prevents damage during installation.
Additionally, having clamps on hand can be very helpful. They secure the pipes in position while you work. Consider using high-temperature silicone or gasket material to enhance the seal. Proper sealing can minimize exhaust leaks. Remember to wear safety gloves and goggles. Safety should always come first, especially when working with metal and sharp edges.
Experimentation is key. Sometimes, the flange may not fit perfectly on the first try. Adjustments are a part of the process. Take your time to measure and recheck everything. Reflect on what works best for your specific project and adapt accordingly. Each attempt provides valuable insights for future endeavors. Embrace the learning curve as you delve into the world of exhaust flanging.
| Tool/Material | Description | Tips for Use |
|---|---|---|
| Pipe Cutter | Used to cut the exhaust pipe to desired lengths. | Ensure a clean, straight cut to avoid leaks. |
| Flange Kit | Includes necessary flanges, bolts, and nuts to assemble the exhaust system. | Choose the right size for your exhaust pipe. |
| Welding Machine | Used to securely attach flanges to the exhaust pipe. | Practice on scrap material to master technique. |
| Gasket | Seals the connection between flanges to prevent leaks. | Ensure it's compatible with exhaust temperatures. |
| Torque Wrench | Used to apply proper torque to bolts. | Follow specifications to avoid over-tightening. |
Flanging an exhaust pipe is a crucial task for ensuring proper fit and function. The right technique makes all the difference. Begin by measuring the pipe sections accurately. A good fit avoids leaks and improves performance. Use a marker to indicate where the flange will be placed. Accuracy at this stage is vital.
Next, prepare the tools needed for the job. A flange tool, hammer, and clamps are essential. You might find that your first attempt doesn’t yield perfect results. That’s okay; practice is part of the process. Secure the pipe in a vise, ensuring it is steady. Carefully hammer the edges to create the flange. Watch for evenness; an uneven flange can lead to problems later.
After flanging, check for gaps. A small gap can cause significant issues. If gaps exist, consider re-flanging or adjusting. It’s common to face challenges along the way. Reflect on your technique and make adjustments as needed. Mastery comes with time and experience. Focus on each step, and don’t rush the process.
Flanging exhaust pipes is a common task, yet many make the same mistakes. Understanding these pitfalls can save time and improve results. One frequent error is improper alignment during flanging. Incorrect alignment leads to leaks and exhaust flow issues. Ensure the pipes are securely held in place before starting the flanging process. Keeping everything straight is crucial for a successful fit.
Another common mistake is neglecting to measure accurately. Many rush through measurements, leading to poorly fitting flanges. It’s vital to take your time and double-check all dimensions. Use a caliper for precise measurements. This attention to detail pays off in the long run.
Tips to enhance your flanging skills include practicing on scrap material first. This trial allows you to refine techniques without the pressure of a final product. Additionally, using the right tools can make a significant difference. Invest in good quality flanging tools; they ensure consistent results. This can make the process smoother.
Overall, be mindful of these common mistakes. Awareness will lead to improved outcomes in your exhaust pipe flanging projects.
Maintaining flanged exhaust connections is essential for optimal performance.
Regular inspection helps identify wear and tear. Look for signs of corrosion or cracks in the flanges.
These issues can lead to exhaust leaks, negatively affecting engine performance and emissions.
Check the tightness of the bolts during maintenance. Loose bolts can cause vibrations and misalignment.
A simple torque wrench can help ensure bolts are properly tightened. Inspecting the gasket material is also crucial.
Over time, gaskets can degrade, leading to leaks. Replacing a worn gasket can prevent further damage.
Always keep an eye on exhaust smoke color. Blue smoke often indicates oil leaks, while black smoke could signal an overly rich fuel mixture.
Addressing these issues early can save time and costly repairs. Regular inspections will help maintain system integrity.
Don't overlook these vital checks. They are key to ensuring a well-functioning exhaust system.
: You need a good quality exhaust flanging tool and a pipe cutter. A deburring tool is also helpful.
Incorrect alignment can cause leaks and exhaust flow issues. Secure the pipes properly before starting.
Use a pipe cutter to achieve clean cuts. This creates an even surface for fitting.
High-temperature silicone or gasket material can minimize exhaust leaks and ensure a tight seal.
Measure accurately and double-check all dimensions. Rushing can lead to poor-fitting flanges.
Yes, practicing on scrap material allows you to refine your techniques without pressure.
Always wear safety gloves and goggles to protect against metal and sharp edges.
Take your time to measure and recheck. Adjustments are part of learning and improving.
Embrace the learning curve. Each attempt provides insights for better outcomes in future projects.
Small details can significantly affect the final result, leading to successful installations over time.
In the article "How to Flange Exhaust Pipe Best Techniques and Tips," readers are guided through the essential aspects of flanging exhaust pipes. It begins with an overview of the flanging process, highlighting its importance in creating secure exhaust connections. The article then lists the necessary tools and materials, ensuring that readers are well-equipped to undertake the task. A detailed, step-by-step guide is provided to walk individuals through the flanging procedure, emphasizing proper techniques for optimal results.
Additionally, the article addresses common mistakes that individuals might make during the flanging process, offering tips on how to avoid them. Lastly, it underscores the significance of maintaining and inspecting flanged exhaust connections for longevity and performance. Overall, this comprehensive guide serves as a valuable resource for anyone looking to understand how to flange exhaust pipe effectively and efficiently.
EZ STEEL