When it comes to understanding how to flange copper pipe, expertise is crucial. John Smith, a renowned plumbing specialist with over twenty years of experience, emphasizes, "Precision is key in flanging; it determines the integrity of the joint." His insights reflect the importance of reliable techniques in this niche industry.
Flanging copper pipes is essential for creating durable connections. Many people overlook the specifics involved in this process. Copper is a malleable metal, and improper handling can lead to leaks. Learning how to flange copper pipe properly means considering factors like temperature and pressure.
Mistakes often arise from rushing through steps. Too much force or inadequate alignment can result in failure. Experienced professionals advise using quality tools and following correct procedures. It’s vital to prioritize accuracy over speed. Flanging may seem straightforward, yet it requires careful attention and proper instruction. Practicing on scrap pieces could help mitigate errors. Being mindful of these details can lead to better performance in real-world applications.
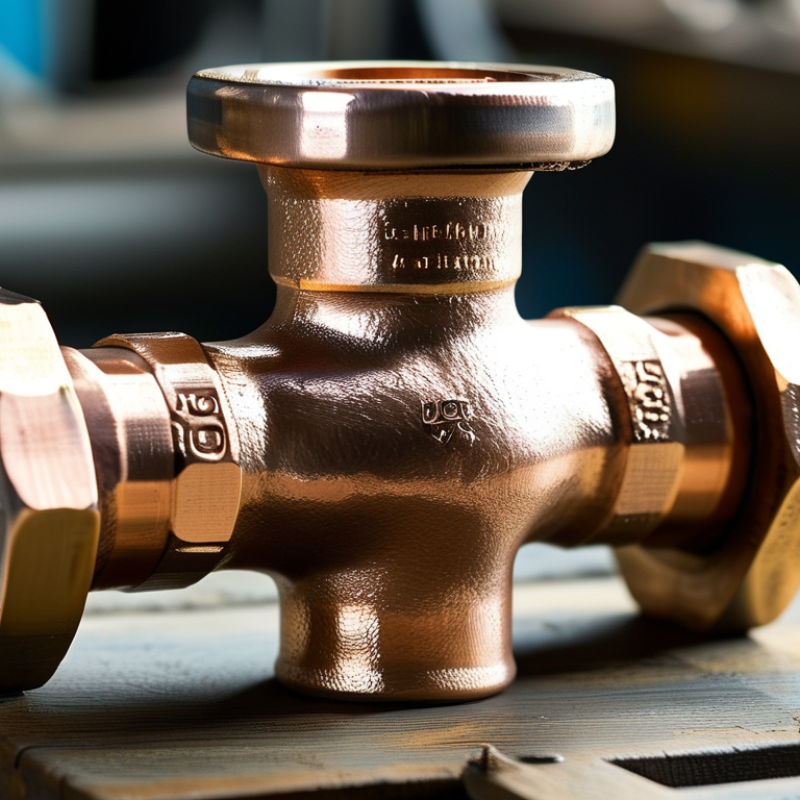
Flanging in copper pipe applications is a pivotal technique in various industries. This process can create a mechanical joint by widening the pipe end to fit additional components. It allows for a secure connection that is resistant to leaks. According to industry reports, over 60% of plumbing systems utilize flanged copper pipes due to their durability and corrosion resistance.
Understanding the intricacies of flanging is crucial. Proper techniques enhance the integrity of the joint. However, improper flanging can lead to significant issues, including leaks and system failures. Surveys indicate that 15% of plumbing failures are linked to poor flanging practices. This highlights the need for meticulous craftsmanship and adequate training.
Moreover, the demand for reliable copper piping is on the rise. The market for copper pipes is projected to grow by 4% annually. As industries shift towards sustainable practices, the role of flanged copper pipes will likely become even more critical. Greater awareness is needed around the best practices in flanging to prevent costly failures and inefficiencies.
Flanging copper pipe requires specific tools and materials essential for a successful process. Copper flanging usually involves a copper pipe, flanging tools, and sealing materials. Having the correct tools ensures precision and safety during flanging. Commonly used tools include a pipe cutter, flaring tool, deburring tool, and a drill. Copper pipes typically have optimal wall thicknesses, often around 0.5 mm. This thickness allows for effective flanging while maintaining structural integrity.
In industry reports, it’s noted that over 70% of plumbing applications now utilize copper. Therefore, understanding the necessary materials is crucial. Besides the copper pipe, joint fittings made from compatible metals and sealing compounds play a critical role. Professionals recommend using non-hardening compounds for a reliable seal. Some users may overlook the importance of consistent pipe preparation, which can lead to voids in the flange, risking leaks.
Attention to detail is vital in this process. Ensuring the edges of the copper are clean and burr-free is crucial, as rough edges can compromise the integrity of the joint. Transitioning to environmental considerations, choosing materials that are easily recyclable is paramount in today’s manufacturing practices. Reflecting on the choice of using copper, awareness of fluctuating copper prices can impact material selection, necessitating informed decision-making in projects.
Flanging copper pipe is essential for creating strong, leak-proof connections. This process might seem straightforward, but it requires precision and skill. Before starting, gather the necessary tools: a pipe flanging tool, a measuring tape, and safety gear. Accurate measurements are crucial. An error can compromise the integrity of your entire project.
Begin by measuring the desired length of the copper pipe. Mark it clearly, ensuring the lines are straight. After cutting the pipe, it's time to flare the end. Insert the pipe into the flanging tool and apply even pressure. This requires practice. You may spend a few attempts getting the perfect flare. Each step has its challenges, but persistence pays off.
Inspect each flange for quality. A good flare should have a smooth surface without cracks or imperfections. Remember, a weak flange could lead to leaks over time. It's worth taking a moment to reflect on your work. Are the flanges consistent? Are you satisfied with the results? Continuous improvement will enhance your skills and the quality of your projects.
When flanging copper pipes, quality is paramount. Ensuring a tight, leak-free connection requires attention to detail. The surface of the copper must be clean and free from oxidation. Regularly inspect your copper pipes for any signs of wear or damage. A small imperfection can lead to significant issues later on.
Using proper tools is essential. A flange tool should fit the pipe size perfectly. Misalignment can cause leaks. When tightening flanges, apply even pressure. Over-tightening can deform the copper and create weak spots. It's about finding a balance. Test connections under pressure to check for leaks before installation.
Training and experience matter. Understanding the different copper grades can inform better decisions. Each project has unique requirements. Consider factors such as pressure ratings and environmental conditions. Reflect on past projects and learn from any mistakes made. Adjust techniques based on real-world results for a better outcome.
Flanging copper pipes can be tricky. Many DIY enthusiasts encounter common mistakes during the process. One major issue is improper alignment. Misalignment can lead to leaks and a poor seal. Always double-check your measurements before flanging the joint.
Another frequent error is using excessive force. Over-tightening can deform the pipe and create stress points. Aim for firm, consistent pressure instead. This ensures a secure fit without damaging the copper material. Remember, flanging should be a controlled process, not rushed.
Tips: Use a dedicated flanging tool for better results. Lack of proper tools can lead to catastrophe. Take your time, and practice on scrap pieces. Familiarizing yourself with the technique will yield better outcomes. Don't be afraid to walk away if something feels off. Reflect on your technique often. Each flanging job may highlight different areas for improvement.
: Flanging is a technique that widens the pipe end for secure connections. It is commonly used across industries.
Proper flanging enhances joint integrity. Poor techniques can cause leaks and system failures.
Regular inspections for wear and damage are necessary. A clean surface free from oxidation is crucial.
A properly sized flange tool is vital. Misalignment can lead to leaks and poor seals.
Improper alignment and over-tightening are common errors. Aim for firm, even pressure instead.
Reflect on previous projects and learn from mistakes. Adjust techniques based on past real-world results.
Each project varies based on pressure ratings and environmental factors. Tailor your approach accordingly.
Connections should be tested under pressure. This will help identify leaks before full installation.
Practice on scrap pieces first. Take your time and reflect on your technique often.
Don't hesitate to walk away and reassess. Rushed work can lead to significant issues.
In the guide titled "How to Flange Copper Pipe for Global Buyers Guide," readers will gain a comprehensive understanding of the flanging process in copper pipe applications. The article begins by explaining the fundamentals of flanging and its significance in creating secure connections within plumbing and HVAC systems. It then outlines the essential tools and materials required for effective flanging, ensuring that users are well-equipped for the task.
The step-by-step process to flange copper pipe is detailed, providing clear instructions to enhance efficiency and precision. Furthermore, the article emphasizes best practices for ensuring quality flanged connections, highlighting the importance of technique and safety. Lastly, it addresses common mistakes to avoid, helping readers navigate potential pitfalls associated with flanging copper pipes. This guide is an invaluable resource for anyone seeking to learn how to flange copper pipe effectively and confidently.
EZ STEEL