Connecting a toilet flange to a drain pipe requires more than tightening a few bolts. The flange must sit level, align with the drain opening, and create a dependable seal beneath the toilet. A small error can cause rocking, sewer odors, or hidden water damage. This guide explains how to connect toilet flange to drain pipe using practical steps and trade-tested considerations.
Before starting, inspect the existing pipe, subfloor, and flange condition. ABS, PVC, and cast-iron systems may require different connectors, primers, solvents, or repair methods. Always confirm material compatibility before joining parts. Measure the pipe carefully, because cutting it too short can turn a simple repair into a costly replacement. Keep the flange supported, especially when the flooring feels soft or uneven.
Work slowly.
Experienced plumbers usually dry-fit every component before applying adhesive. That habit prevents alignment mistakes and gives you time to check the flange height against the finished floor. The top of the flange should generally rest near floor level, though local installation requirements and manufacturer instructions may vary. Use approved materials, follow product curing times, and wear suitable eye protection and gloves.
A useful reality check: even careful work can reveal damaged framing or an unstable drain connection. If the pipe shifts, the subfloor is rotten, or the connection sits inside a concealed wall, professional assessment is sensible. A properly connected flange should remain firm, sit evenly, and support the toilet without excessive movement. Small details matter here.
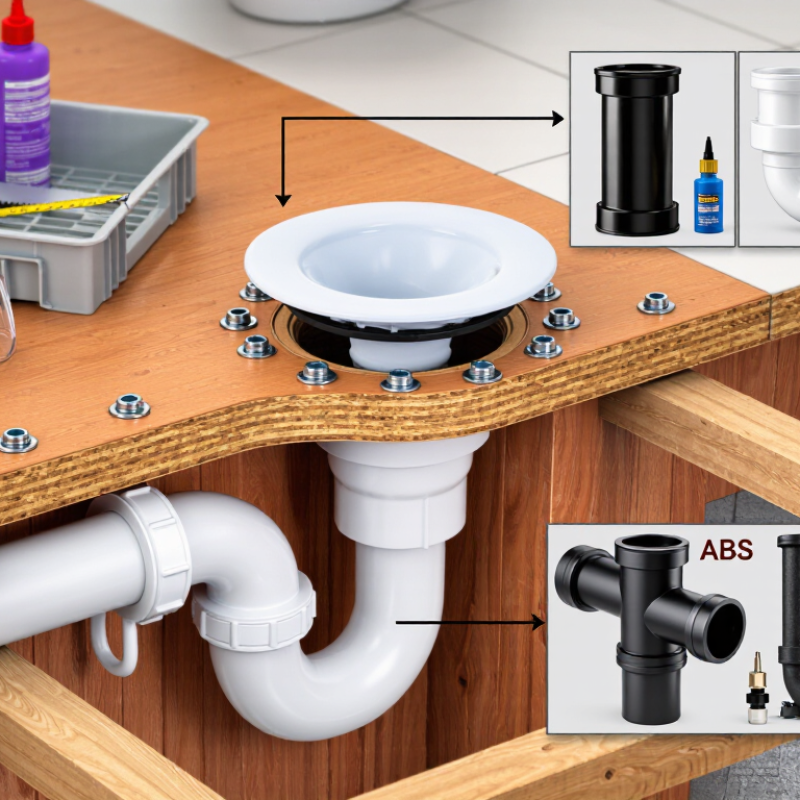
When connecting a toilet flange, assess the drain layout before buying parts. Locate the centerline, pipe diameter, direction, and closet bend. A 12-inch rough-in is common, but it is not universal. Measure from the finished wall, not the baseboard. Check the finished floor height too. The flange should sit at finished-floor level. A flange buried under new tile can compress the seal unevenly. That mistake is easy to miss. It is also costly to correct. Use a level and photograph the open drain before closing the floor.
Select a flange that matches the pipe material and outside diameter. Common choices include PVC, ABS, cast iron, and compression connections. A three-inch drain may accept different flange designs than a four-inch drain. An offset flange can solve a centerline problem, but it should not hide a badly positioned closet bend. The U.S. EPA WaterSense 2023 Progress Report states that labeled products have saved more than 7.5 trillion gallons since 2006. Its tank-type toilet specification limits qualifying models to 1.28 gallons per flush. Efficient flushing still depends on a correctly sized, open drain path. Verify local plumbing requirements before installation.
Tips: Dry-fit the flange first. Check the finished-floor height twice. Do not rely on caulk to compensate for poor alignment. I have seen careful measurements fail because the new flooring was ignored. That is worth reconsidering.
Measure from the finished wall to the center of the drain opening before connecting the flange. The most common residential toilet rough-in distances are 10, 12, and 14 inches.
Choose a flange that matches the drain pipe diameter and fits the measured rough-in. The flange should sit level on the finished floor, while an offset flange may be required when the drain center does not align with the toilet outlet.
Before connecting a toilet flange, make the drain pipe and floor opening easy to inspect. Shut off the water, remove the toilet, and ventilate the room. Wear gloves and eye protection. A damp towel can block sewer gases temporarily, but it is not a substitute for proper ventilation.
Expose enough pipe to check its material, diameter, and condition. The 2024 International Plumbing Code generally recognizes a 3-inch minimum drain size for many water-closet installations, but local amendments may differ. Measure from the finished floor, not the subfloor. The flange should sit at the finished-floor level and remain firmly supported.
Cut the drain pipe squarely, then remove burrs with a deburring tool. Clean dust, wax, and old adhesive from the work area. Small mistake, expensive rework.
Place the flange over the pipe without sealant first. This dry fit reveals an uneven cut, a damaged pipe edge, or misplaced mounting holes. I once trusted a rough measurement and had to repair the flooring later. That was avoidable.
The U.S. Environmental Protection Agency reports that modern efficient toilets use 1.28 gallons per flush or less, compared with the older 1.6-gallon federal limit.
Lower flow makes a stable, unobstructed drain path even more important. Check the pipe’s slope, keep debris outside the opening, and confirm every fastener can reach solid flooring before final attachment. Always compare the installation with local plumbing requirements and the flange manufacturer’s technical instructions.
How to Connect a Toilet Flange to a Drain Pipe?
Position and Secure the Toilet Flange at the Finished Floor Level
A toilet flange should sit on top of the finished floor, not on the bare subfloor. Measure from the wall behind the toilet to locate the drain centerline accurately. Dry-fit the flange over the drain pipe before applying any permanent connection. Its opening must align with the pipe, and its screw holes should land on solid flooring. I once rushed this step and found the flange slightly off-center. That small error made the toilet rock and complicated the seal.
Trim the drain pipe only after checking the final floor height. The flange should rest flat without rocking. Connect it using the correct fitting method for the pipe material, then fasten it through every suitable hole. Use corrosion-resistant screws long enough to grip the subfloor securely. Avoid overtightening. A warped flange can create a leak or an unstable toilet. Check the level from several directions before installing the wax or flexible seal.
Tips: Keep the flange supported while tightening. Mark the screw locations first. If the finished floor is uneven, correct it before sealing. Never use sealant to hide a flange that sits too low. Follow local plumbing requirements, and ask a qualified plumber when the drain connection is damaged or uncertain. A careful recheck is worth the extra minute.
| Installation Dimension or Check | Typical Value or Requirement | Recommended Installation Practice | Field Verification |
|---|---|---|---|
| Toilet drain pipe size | 3 in or 4 in (76 mm or 102 mm nominal diameter) |
Use a flange designed for the existing drain-pipe diameter. Confirm the pipe size before selecting the flange connection method. | Measure the pipe or identify its nominal size from the existing installation. Do not rely only on the outside diameter. |
| Flange position relative to finished floor | Flange top should be level with, or slightly above, the finished floor surface. | Install the flange after accounting for the final flooring thickness. The flange must be supported by the finished floor or by a solid structural surface. | Place a straightedge across the floor and check that the flange is not recessed below the surrounding finished floor. |
| Finished floor height allowance | Equal to the planned flooring build-up, such as tile, underlayment, or sheet flooring. | Dry-fit the flooring layers around the drain before permanently securing the flange. A flange installed too early may end up too low. | Measure from the subfloor to the top of the completed flooring and compare this distance with the flange elevation. |
| Pipe connection depth | As specified by the flange design and applicable plumbing requirements. | Insert the pipe fully into the flange socket or fitting without forcing it beyond the intended stop. For solvent-welded connections, use compatible primer and cement where required by the fitting instructions. | Check that the pipe is fully seated, aligned, and free from dirt, standing water, or burrs before making the connection. |
| Flange alignment | Bolt slots centered on the toilet base mounting holes. | Rotate the flange so the mounting slots align with the toilet bolt locations before the connection sets or the flange is fastened. | Place the toilet over the dry-fitted flange or use a template to confirm that both bolt positions are accessible. |
| Fastener location | Fasteners should penetrate solid wood, concrete, or another approved structural support. | Secure every available flange mounting hole that is supported by the floor structure. Do not depend on flooring alone for attachment. | Inspect beneath the flange, where accessible, to verify that screws or anchors are not fastened only into a weak or unsupported layer. |
| Fastener type | Corrosion-resistant screws or anchors suitable for the floor material. | Use fasteners compatible with wood, concrete, or other substrate conditions. Follow the fastener manufacturer’s drilling and tightening requirements. | Confirm that the fastener heads sit securely without cracking the flange or deforming its mounting surface. |
| Flange stability | No rocking, bending, or vertical movement after fastening. | Shim or repair an uneven support surface before installing the toilet. The flange should remain rigid when moderate hand pressure is applied. | Test the flange by hand before setting the toilet. Any movement should be corrected before sealing the toilet base. |
| Drain and flange cleanliness | Clean, dry, and free of construction debris. | Remove dust, pipe shavings, old seal material, and standing water from the connection area before applying a seal or joining the pipe. | Use a light and visual inspection to confirm that the drain opening is unobstructed and the flange sealing surface is clean. |
| Seal location | Seal centered between the toilet outlet and the flange opening. | Install the approved toilet seal according to its instructions. Lower the toilet vertically without sliding it sideways across the seal. | Check that the toilet sits evenly on the finished floor and that the seal is not displaced during placement. |
| Toilet mounting bolts | Bolts positioned in both flange slots and aligned with the toilet base holes. | Install washers and nuts, then tighten gradually from side to side. Stop when the toilet is stable; excessive tightening can damage the porcelain base. | Verify that the bowl does not rock after tightening. Use suitable shims if the floor is uneven. |
| Final leak and movement check | No visible leakage, odor, or toilet movement. | Reconnect the water supply, fill the tank, and flush several times while inspecting the flange area and nearby drain connection. | Check the floor around the toilet and the ceiling below, where accessible, for signs of moisture after testing. |
A toilet flange must connect firmly to the drain pipe before the wax ring is installed. I usually dry-fit the flange first and check its height against the finished floor. The flange should sit level, with its opening centered over the drain. If it sits too low, the wax ring may not compress evenly. That small mistake can cause a hidden leak.
For plastic drain pipes, use a compatible solvent cement and follow its setting time. For other pipe materials, use an approved mechanical connection suitable for that system. Secure the flange with corrosion-resistant screws driven into solid flooring, not just thin underlayment. Keep the bolt slots aligned with the toilet base. Do not overtighten them. A warped flange is difficult to repair.
Clean and dry the flange surface before placing a new wax ring. Center the ring over the opening, then lower the toilet straight down onto the bolts. Avoid twisting the toilet, because it can move the wax out of position. Press gently until the base rests firmly on the floor. I sometimes check alignment twice; guessing here is rarely efficient. Tighten each nut gradually, alternating sides, and stop when the toilet is stable. Test for movement and flush several times. Watch the flange area carefully for moisture. If the floor flexes or the toilet rocks, correct that problem before applying caulk around the base.
Before connecting the toilet, inspect the flange and the drain opening carefully. The flange should sit level with the finished floor. Its rim must remain firm when you press it by hand. If it moves, the drain connection may need repair before installation. A loose flange can make the toilet rock and damage the seal.
Check the toilet base on a clean, flat surface. Look for hairline cracks, rough edges, or dried material that could prevent even contact. Set the toilet over the flange without forcing it. It should rest evenly on the floor. I once rushed this step and blamed the seal for a rocking toilet. The real problem was an uneven base.
After securing the toilet, tighten the nuts gradually on both sides. Stop when the bowl feels stable. Porcelain can crack under excessive pressure. Connect the water supply, then flush several times while watching the base. Use a dry tissue around the joint because small leaks may not appear as visible drops. Check the floor below, if accessible, for moisture or staining. Wait ten minutes and inspect again. A successful test should show no movement, odor, or dampness. If the flange shifts, the toilet rocks, or water appears beneath the base, remove the fixture and correct the connection instead of adding more sealant.
Shut off the water and remove the toilet. Ventilate the room and wear gloves and eye protection. Cover the drain opening temporarily. Do not rely on the towel alone.
Expose enough pipe to check its material, diameter, and condition. Look for cracks, dents, corrosion, or an uneven cut. Confirm the drain opening remains free of debris.
The flange should rest on top of the finished floor. Measure from the finished surface, not the subfloor. A low flange should not be hidden with sealant.
Place the flange over the pipe without sealant first. Check its alignment, mounting holes, and flatness. This reveals problems before permanent attachment. Small mistake, costly repair.
Cut the pipe squarely after confirming the final floor height. Remove sharp burrs with a deburring tool. Clean away dust, old adhesive, wax, and loose material.
Measure from the wall behind the toilet to locate the drain centerline. Ensure the flange opening aligns with the pipe. Its screw holes must reach solid flooring.
Use corrosion-resistant screws long enough to grip the subfloor securely. Fasten every suitable hole while supporting the flange. Avoid overtightening, which can warp it.
Check the flange level from several directions. It should sit flat without rocking. Verify the floor is even and the toilet will remain stable. I once trusted a rough measurement and regretted it. Recheck the work.
Stop before applying sealant. Compare the work with local plumbing requirements and the fitting instructions. Ask a qualified plumber when the connection is uncertain or damaged. Better to pause.
Learning how to connect toilet flange to drain pipe starts with assessing the existing drain layout and choosing a flange that matches the pipe size, material, and toilet outlet. Before installation, clean the drain pipe, remove debris, confirm the finished floor height, and prepare a stable, accessible work area. The flange should sit level with or slightly above the finished floor so the toilet can rest properly and the connection can remain secure.
Once positioned, fasten the flange firmly to the floor and seal its connection to the drain pipe according to the pipe type. Install a new wax ring or suitable toilet seal, then carefully lower the toilet onto the flange while keeping it aligned. Tighten the mounting nuts evenly without over-tightening, reconnect the water supply, and flush the toilet several times. Finally, inspect around the flange, toilet base, and drain connection for movement or leaks, making any necessary adjustments before completing the installation.

EZ STEEL