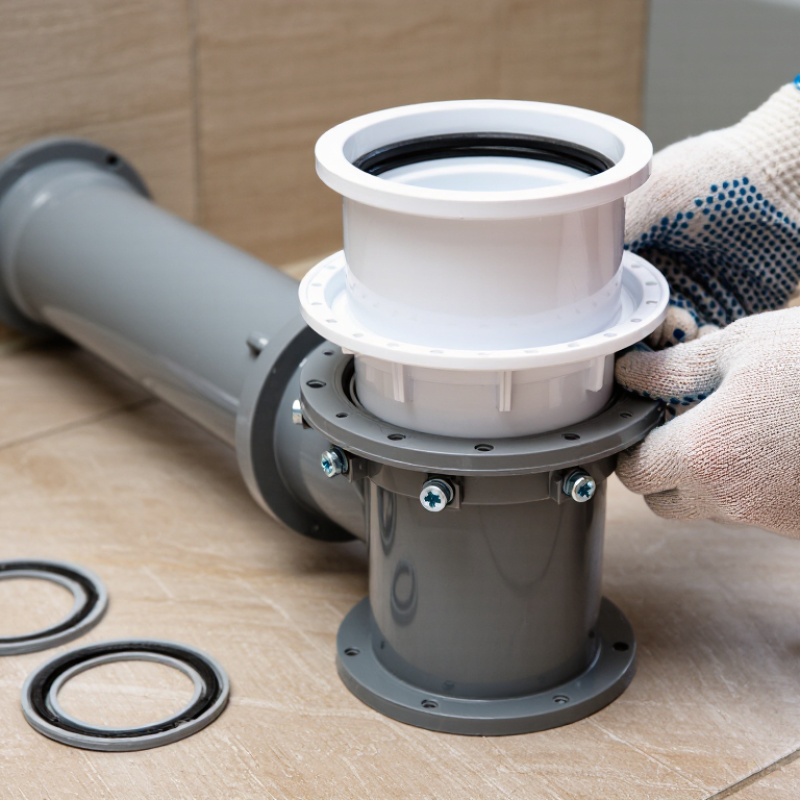
How to Connect a Toilet Flange to a Sewer Pipe?

Time:2026-10-18 Author:Sienna
0%

Connecting a toilet flange to a sewer pipe looks simple, but small errors can create large plumbing problems. A flange that sits too high may rock the toilet. One set too low can compress the wax ring unevenly. Water may escape beneath the bowl, even when the bathroom floor looks dry.

If you are learning how to connect toilet flange to sewer pipe, begin by identifying the existing pipe material. ABS, PVC, and cast iron may require different fittings, tools, and connection methods. The flange should be firmly supported, centered over the drain, and positioned at the correct finished-floor height. Use approved transition components when joining different materials. Never rely on adhesive alone to correct poor alignment.

Canadian contractor and renovation expert Mike Holmes often says, “Make it right.” That short advice fits this repair well. A clean cut, a dry test fit, and properly placed stainless-steel screws matter more than speed. The work can feel finished before it is truly secure. That is where I would pause and check again.

Inspect the pipe for cracks, movement, or hidden corrosion before installing the flange. Confirm local plumbing requirements, because acceptable methods vary by location. After installation, set the toilet carefully and test for leaks several times. A stable toilet, an even seal, and a dry floor are the real signs of success. Even experienced installers can miss a slight tilt. Careful checking remains essential.

How to Connect a Toilet Flange to a Sewer Pipe?

Assess the Existing Toilet Flange and Sewer Pipe

How to Connect a Toilet Flange to a Sewer Pipe?

Assess the Existing Toilet Flange and Sewer Pipe

Before connecting a toilet flange, inspect the existing drain opening carefully. Remove the toilet and scrape away old wax, sealant, and loose flooring. The flange should sit level with the finished floor, not several millimeters above it. Check for cracks, corrosion, movement, and missing fasteners. A flexible flange can signal damaged subflooring or a poorly supported sewer connection.

Look inside the sewer pipe with a bright inspection light. The pipe should remain round, open, and firmly connected below the flange. Watch for standing water, roots, mineral buildup, or a displaced joint. The U.S. Environmental Protection Agency reports that household leaks waste nearly 10,000 gallons of water annually, while 10% of homes lose more than 90 gallons daily. A hidden flange leak can contribute to that waste.

Measure the pipe diameter before selecting the replacement flange. Do not trust the old part alone. Older installations can contain unusual materials or altered connections. Plumbing code guidance generally requires the closet flange to be securely fastened and properly supported, but field conditions are rarely perfect. I have seen a flange appear sound until the floor flexed under body weight. That detail matters. If the sewer pipe moves, stop and repair its support before installing anything. A new seal cannot compensate for movement, uneven flooring, or a cracked pipe. Take photos and record measurements; small assumptions here can create expensive leaks later.

Gather Tools, Materials, and Required Safety Equipment

Before connecting a toilet flange to a sewer pipe, prepare the work area carefully. Gather an adjustable wrench, screwdrivers, a tape measure, a level, a hacksaw, a utility knife, and a flashlight. Keep a bucket, disinfectant, and absorbent rags nearby. You may also need a replacement flange, closet bolts, sealing gasket, corrosion-resistant screws, and approved primer and cement for plastic pipe. Check the existing pipe material first. A poor material match can create leaks.

Wear waterproof gloves, safety glasses, sturdy shoes, and knee protection. Open a window when possible. Shut off the water supply, drain the toilet, and remove standing water before cutting or loosening parts.

The U.S. Bureau of Labor Statistics reported 1,075 fatal work injuries in construction and extraction occupations during 2023. That figure reinforces a simple point: small repairs still deserve serious safety habits. Never work over an unstable floor opening. Secure tools within reach.

Tips: Measure the pipe before buying parts. Use a level to check flange height. Keep the flange supported and fastened to solid flooring. Do not force a damaged pipe into alignment. I used to treat extra screws as a complete fix, but weak subflooring can still allow movement. If sewer odors increase, stop and ventilate the room. A cracked drain connection, hidden floor damage, or uncertain pipe type deserves evaluation by a qualified plumbing professional.

Prepare and Align the Sewer Pipe Opening

Before connecting a toilet flange, expose the sewer pipe opening completely. Remove old wax, mortar, debris, and standing water. The pipe should be stable, clean, and cut square. A crooked opening can pull the flange off-center, creating an uneven seal beneath the toilet.

Measure from the finished wall, not the rough framing. Center the opening according to the flange dimensions and the toilet manufacturer’s rough-in requirement. Dry-fit the flange without fasteners, then check that it sits evenly on the finished floor. The sewer pipe must remain plumb, while the flange should stay level. The 2024 International Plumbing Code emphasizes secure support for horizontal drainage piping, which helps prevent movement at this connection. Insurance Information Institute data shows water damage and freezing represented 21.9% of homeowners’ insurance claims from 2017 to 2021. Small alignment errors can become expensive leaks.

Tips: Use a level across the flange in two directions. Mark the screw locations before drilling. Keep the opening covered while working. This blocks debris and sewer gases. A slightly loose pipe may look harmless, but it needs correction before the flange is secured. I once found that a few millimeters of offset changed the toilet’s seating position noticeably. Recheck the centerline before applying any sealant or fasteners.

How to Connect a Toilet Flange to a Sewer Pipe? – Prepare and Align the Sewer Pipe Opening
Step Preparation Dimension What to Do Accuracy and Safety Check
1 Confirm the pipe type and size Identify the drain pipe material and nominal size before selecting the toilet flange. Residential toilet waste lines are commonly 3 in (76 mm) or 4 in (102 mm) nominal pipe sizes. The flange opening, pipe connection, and sealing method must be compatible with the existing sewer pipe.
2 Expose the sewer pipe opening Remove the old flange, damaged seal, flooring debris, and loose material. Expose enough sound pipe or fitting to create a clean connection without disturbing the drain line. Do not cut into the pipe until its route and condition are confirmed. Replace cracked, crushed, or heavily corroded sections.
3 Set the finished-floor reference Measure from the top of the finished floor, including tile or other final flooring. The flange must be positioned to match the finished floor level rather than the unfinished subfloor. A large height difference can prevent the toilet from sealing correctly and may require an approved extension or repair method.
4 Center the flange Place the flange over the sewer pipe and align its outlet with the pipe opening. Keep the flange centered under the toilet outlet and oriented so the mounting slots can receive the closet bolts. The toilet should sit fully on the flange without the bowl or bolts contacting the wall, cabinet, or other obstruction.
5 Check wall clearance Use the toilet manufacturer’s rough-in measurement to locate the flange from the finished wall. A common residential rough-in is approximately 12 in (305 mm), but the actual fixture specification controls. Measure from the finished wall, not just the wall framing. Account for baseboard thickness and any wall covering.
6 Prepare the pipe surface Cut the pipe square when necessary, then remove burrs and clean the outside or inside connection surface according to the selected flange type. Keep dust and moisture away from solvent-weld or gasketed joints. The pipe end must be smooth, round, clean, and free from damage that could prevent a watertight seal.
7 Dry-fit before fastening Install the flange without permanent adhesive or final fasteners first. Rotate and reposition it until the pipe, bolt slots, wall clearance, and finished-floor height are correct. The flange should lie flat and remain stable. Correct alignment now is easier than repairing a sealed or fastened joint later.
8 Secure to solid support Fasten the flange through its mounting holes into the subfloor or another approved structural support. Use corrosion-resistant fasteners suitable for the flooring and flange material. Fasteners should be evenly distributed and tight enough to prevent movement without cracking the flange or damaging the floor.
9 Complete the pipe connection Apply the connection method specified for the flange and pipe, such as a compatible gasketed joint or solvent-weld connection. Follow the required surface preparation and curing time. Do not move, load, or test a solvent-welded joint until the cement manufacturer’s stated cure time has been met.
10 Verify the opening and level Place a level across the flange and inspect the full opening for obstruction. Confirm that the closet-bolt slots remain accessible and that the flange is not tilted or twisted. The flange must be rigid, properly aligned, and free of debris before installing the wax or elastomeric toilet seal.
11 Perform a drainage check Run an appropriate amount of water through the drain system, if accessible, and inspect the connection for movement or leakage before setting the toilet. Any leak, odor, shifting flange, or visible gap must be corrected before the toilet is installed.
12 Prepare for toilet installation Install the closet bolts in the aligned slots and place the selected toilet seal according to its instructions. Keep the bowl level during placement and tighten the nuts gradually. Avoid overtightening, which can crack the porcelain. Trim excess bolt length only after the toilet is stable and leak-free.

Connect and Secure the Toilet Flange

A toilet flange creates the firm connection between the toilet and the sewer pipe. Before installation, inspect the pipe for cracks, movement, or uneven cuts. Remove old wax, rust, and debris from the surrounding floor. The pipe should sit at the correct height and remain centered in the flange opening. Measure carefully. A small mistake can cause leaks beneath the floor.

Choose a flange designed for your sewer pipe material and floor type. Fit it over or inside the pipe, according to its design, and keep it level with the finished floor. Mark the screw holes, then drill only where the subfloor can hold fasteners securely. Use corrosion-resistant screws and tighten them evenly. Do not overtighten them, because a plastic flange can crack. Install the closet bolts, then check that they stand straight. A dry test with the toilet can reveal alignment problems before sealing.

Tips: Support the pipe below the flange if it feels loose. A flexible connection is not a secure connection. Check local plumbing requirements before closing the floor. If the flange is below floor level, use an approved spacer or repair method rather than forcing the toilet downward. I have found that rushing this step creates more work later. After placing the toilet, press it down gently and check for rocking. Shim carefully if needed, then test for leaks after the supply water is restored.

How to Connect a Toilet Flange to a Sewer Pipe?

Connect and Secure the Toilet Flange

Select a flange that matches the sewer pipe's nominal size. The chart shows common DWV PVC pipe outside diameters used when checking flange compatibility.

Before securing the flange, ensure the pipe is clean and square. The flange should sit level on the finished floor, be fastened to the subfloor with corrosion-resistant screws, and be sealed with a compatible toilet seal.

Check the Seal and Prepare for Toilet Installation

How to Connect a Toilet Flange to a Sewer Pipe?

A reliable toilet installation starts with the flange, not the toilet. The flange connects the toilet outlet to the sewer pipe and keeps the seal stable. It should sit level with the finished floor. Check that the drain pipe is clean, open, and properly aligned. Remove dust, old seal material, and standing water around the joint. A loose flange needs repair before installation. Do not depend on caulk to correct movement or a poor connection.

Inspect the flange for cracks, distortion, or rust. Confirm that its opening matches the sewer pipe and that the mounting holes will align with solid flooring. Dry-fit the toilet before setting the seal. This simple step can expose awkward bolt positions or an uneven floor. I once rushed this check and had to lift the toilet again. That mistake was avoidable. Choose a suitable toilet seal for the flange height and floor condition. Press it evenly into place, then lower the toilet straight down. Avoid twisting it, because the seal may shift or compress unevenly. Tighten the nuts gradually and alternate sides. Stop when the toilet is firm. Excessive force can crack the ceramic.

Tips: Keep the flange and floor completely dry. Use a level during inspection. If the flange sits too low, correct the height with a suitable extension method. After installation, flush several times and inspect the joint closely. A dry paper towel around the base can reveal a small leak. If the sewer pipe or flange is damaged, consult a qualified plumber and follow local plumbing requirements.

FAQS

How should I inspect the existing toilet flange?

Remove the toilet and scrape away old wax, sealant, and loose flooring. The flange should sit level with the finished floor. Check for cracks, corrosion, movement, and missing screws. A flexible flange needs investigation. It may indicate weak flooring or pipe support.

What should I check inside the sewer pipe?

Use a bright inspection light. The pipe should be round, open, and firmly connected. Look for standing water, roots, mineral buildup, or displaced joints. Cover the opening during work. It limits debris and sewer gases.

How do I measure the sewer pipe correctly?

Measure the pipe diameter before choosing a replacement flange. Do not rely on the old flange alone. Older plumbing may contain unusual materials or altered connections. Record measurements and take photos. Small guesses can become expensive repairs.

How should I prepare the pipe opening?

Remove old wax, mortar, debris, and standing water. The pipe should be stable, clean, and cut square. A crooked opening can pull the flange off-center. That creates an uneven seal beneath the toilet.

How do I align the flange?

Measure from the finished wall, not the rough framing. Center the opening according to the toilet’s required rough-in distance. Dry-fit the flange without screws. Use a level in two directions. Recheck the centerline.

How do I secure the toilet flange?

Mark the screw holes before drilling. Drill only into flooring that can hold the fasteners firmly. Use corrosion-resistant screws and tighten them evenly. Do not overtighten plastic parts. They can crack.

What should I do if the sewer pipe moves?

Stop installation and support the pipe below the flange. A new seal cannot fix movement, cracked piping, or uneven flooring. A loose pipe may appear harmless. It is not. I once underestimated a small movement and had to realign everything.

What if the flange sits below the finished floor?

Use an approved spacer or suitable repair method. Do not force the toilet downward. The flange should finish level with the floor. Check local plumbing requirements before closing the floor.

How can I test the toilet connection?

Install the closet bolts and check that they stand straight. Dry-test the toilet before applying sealant. After placement, press it down gently and check for rocking. Shim carefully if needed, then test for leaks after restoring water. Rushing this step is easy. Regrettably, it often creates more work.

Conclusion

Learning how to connect toilet flange to sewer pipe begins with carefully assessing the existing flange, sewer pipe, and floor opening. Check for cracks, corrosion, movement, or uneven surfaces, and confirm that the pipe is positioned at the correct height and centered for the toilet. Gather the necessary hand tools, fasteners, sealing materials, measuring tools, gloves, eye protection, and cleaning supplies before starting. Turn off nearby water access and keep the work area clean and dry.

Prepare the sewer pipe opening by removing debris and smoothing any damaged edges. Align the toilet flange so its bolt slots are correctly positioned and its opening fits securely over or inside the sewer pipe, depending on the connection design. Fasten it firmly to the finished floor without over-tightening. Finally, inspect the joint for gaps, confirm that the flange does not shift, and install the appropriate seal only after the surfaces are clean and level. A careful final check helps ensure a stable, watertight base for toilet installation.

Sienna

Sienna

Sienna is a skilled marketing professional with a deep expertise in our company’s core products and services. With a passion for innovation and detail, she plays a pivotal role in crafting insightful blog posts that not only highlight the unique features of our offerings but also provide valuable......